
Designing print images for fully printed AirPods cases
Fully printed AirPods cases are printed differently from our phone cases, so the positioning advice in our general artwork guide does not apply to them. The file requirements (resolution, color space, PNG at 300 DPI) stay the same.
Two sides in one print file
A fully printed AirPods case consists of four parts: a front and a back shell, each split into a lid and a bottom part. All four parts are printed from a single print file. One half of the file wraps around one side of the case, the other half around the other side.
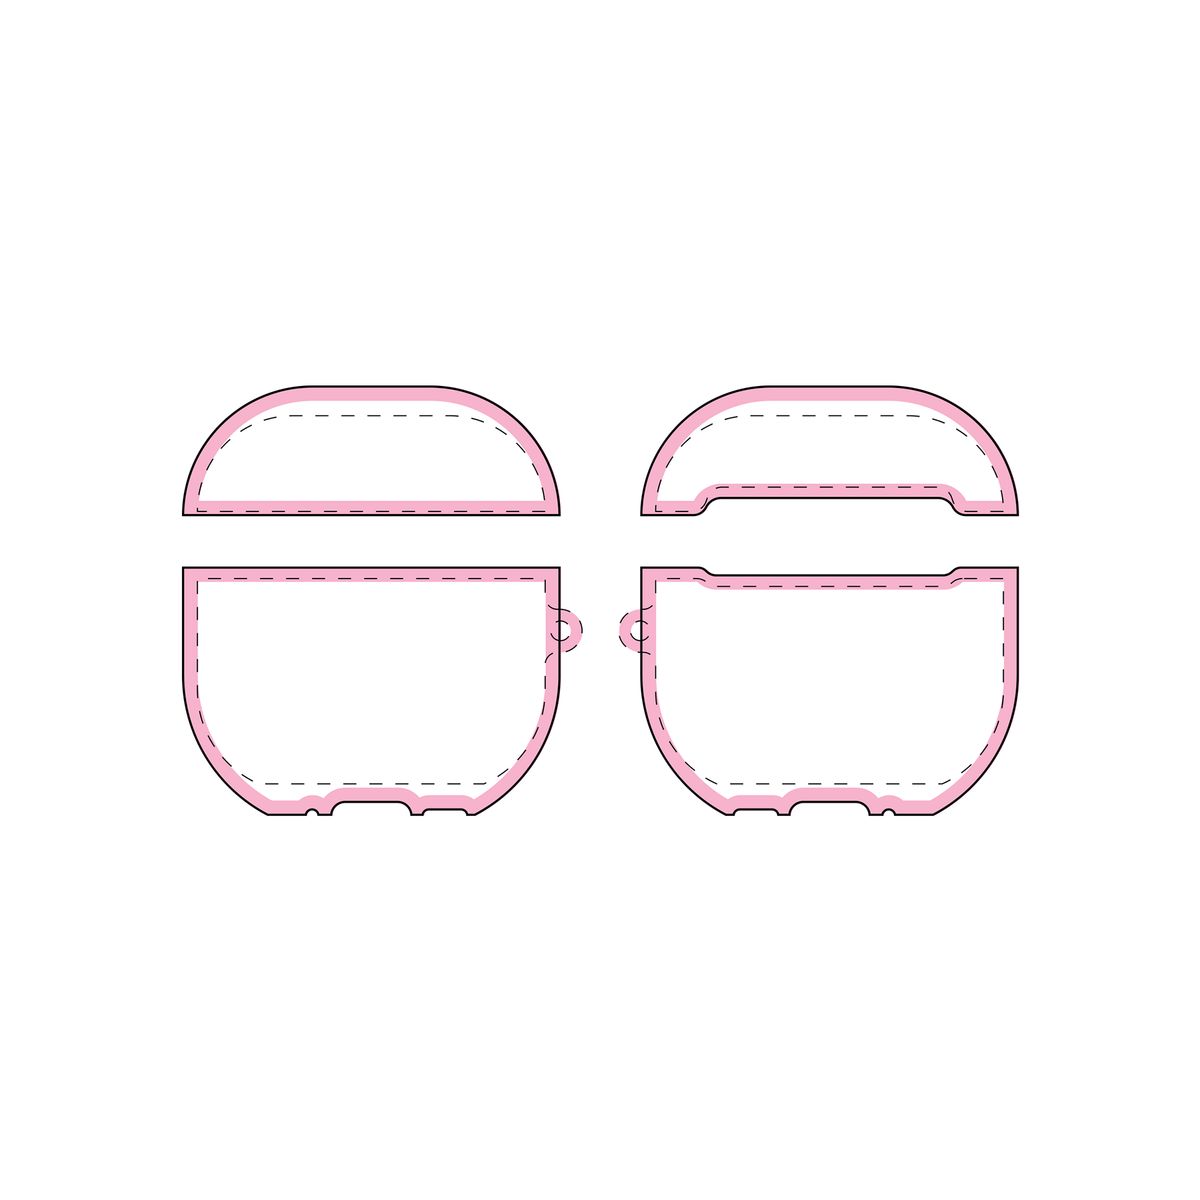
The print layout of the AirPods 4 case. Keep important elements inside the dashed lines and let your design run through to the part outlines, as the outer edges are bleed.
Because each part is printed individually, the design will not align perfectly across all four parts. This is a natural result of the production process and does not affect the quality of the print.
Every model needs its own print image
For phone cases you can make one universal, centered design and sell it on many models. For fully printed AirPods cases this is not possible. Each AirPods model is mounted at its own fixed position on the printer, and that position determines where the case parts sit in the print file. The center of one model's print file is not the center of another's, so a print image made for one model will be misaligned on every other model.
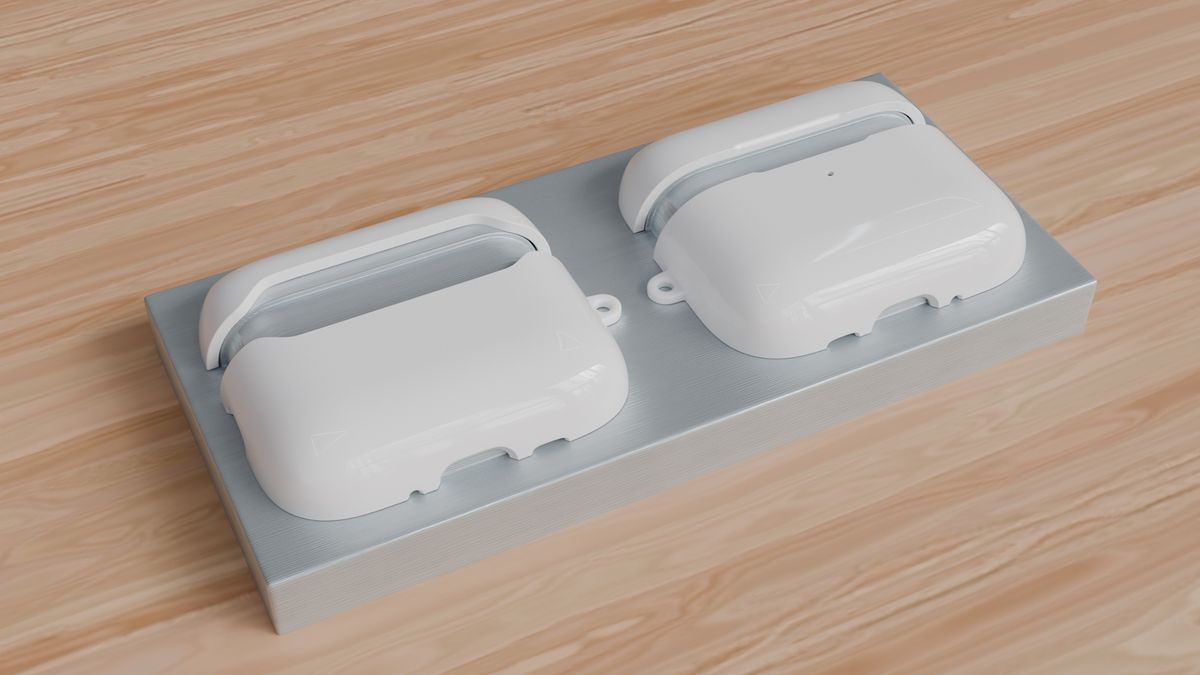
Both halves of the case mounted on the printer. Each model has its own position, matching its print file layout.
Always create a separate print image for every AirPods model you want to sell.
Making a print image
- Open the product in the product catalog and look up the print size in the print block. Download the mask and mockup layers there as well.
- Create a canvas at the pixel size shown next to the print size, which is the print size at 300 DPI.
- Place the mockup layer on top of your design to position it. The mask layer shows exactly which pixels will be printed.
- Keep logos and text away from the part edges and make sure your design covers each part completely, including the bleed.